No Contest

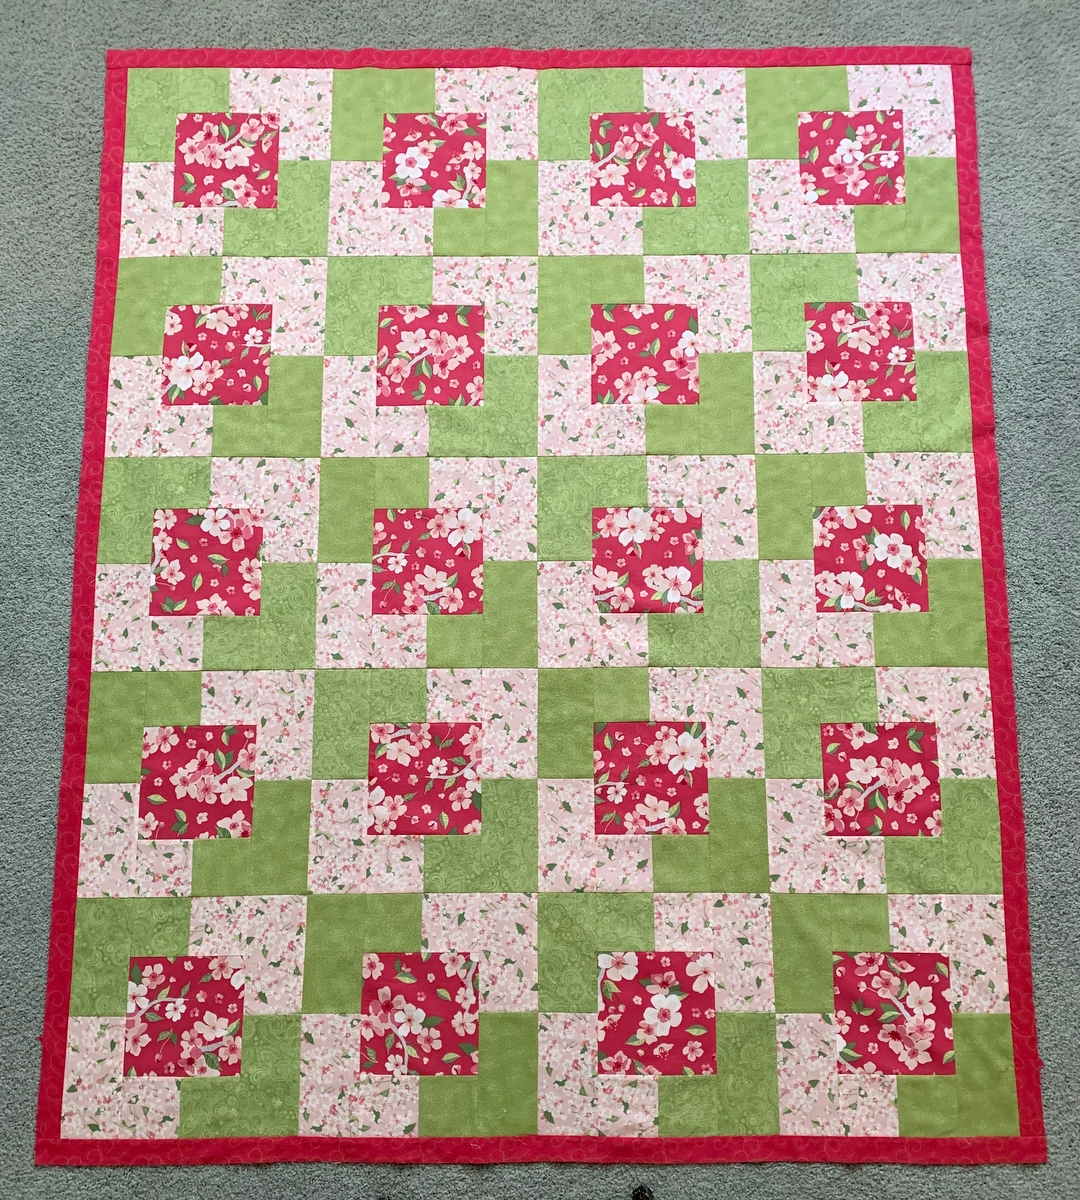
My cherry blossom quilt is back from the longarm quilter and the quilting on it is oh so pretty! My thanks to Karlee of SewInspired2Day for another lovely job.

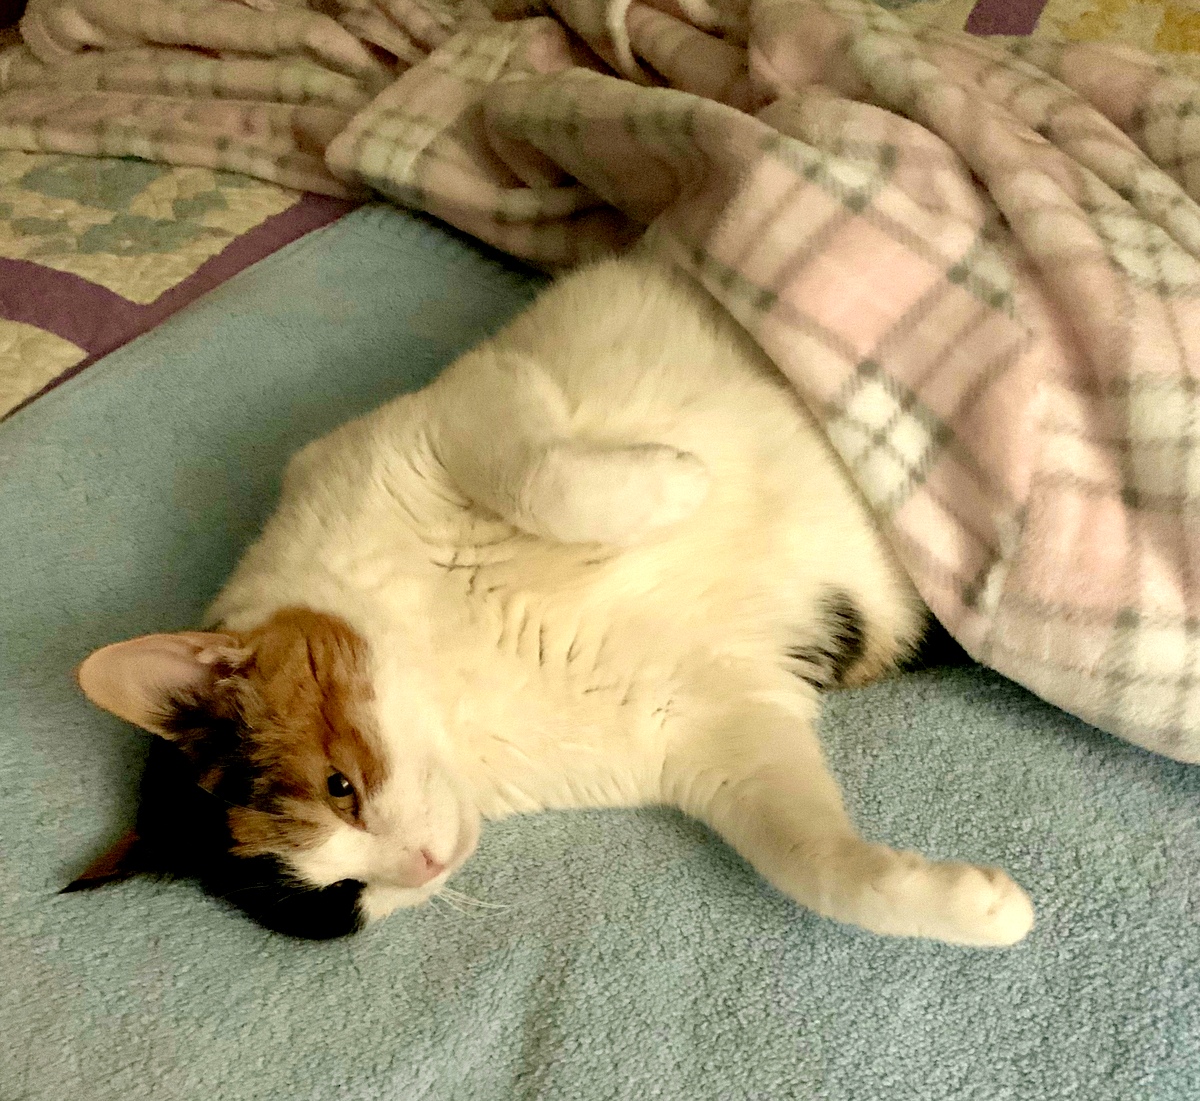
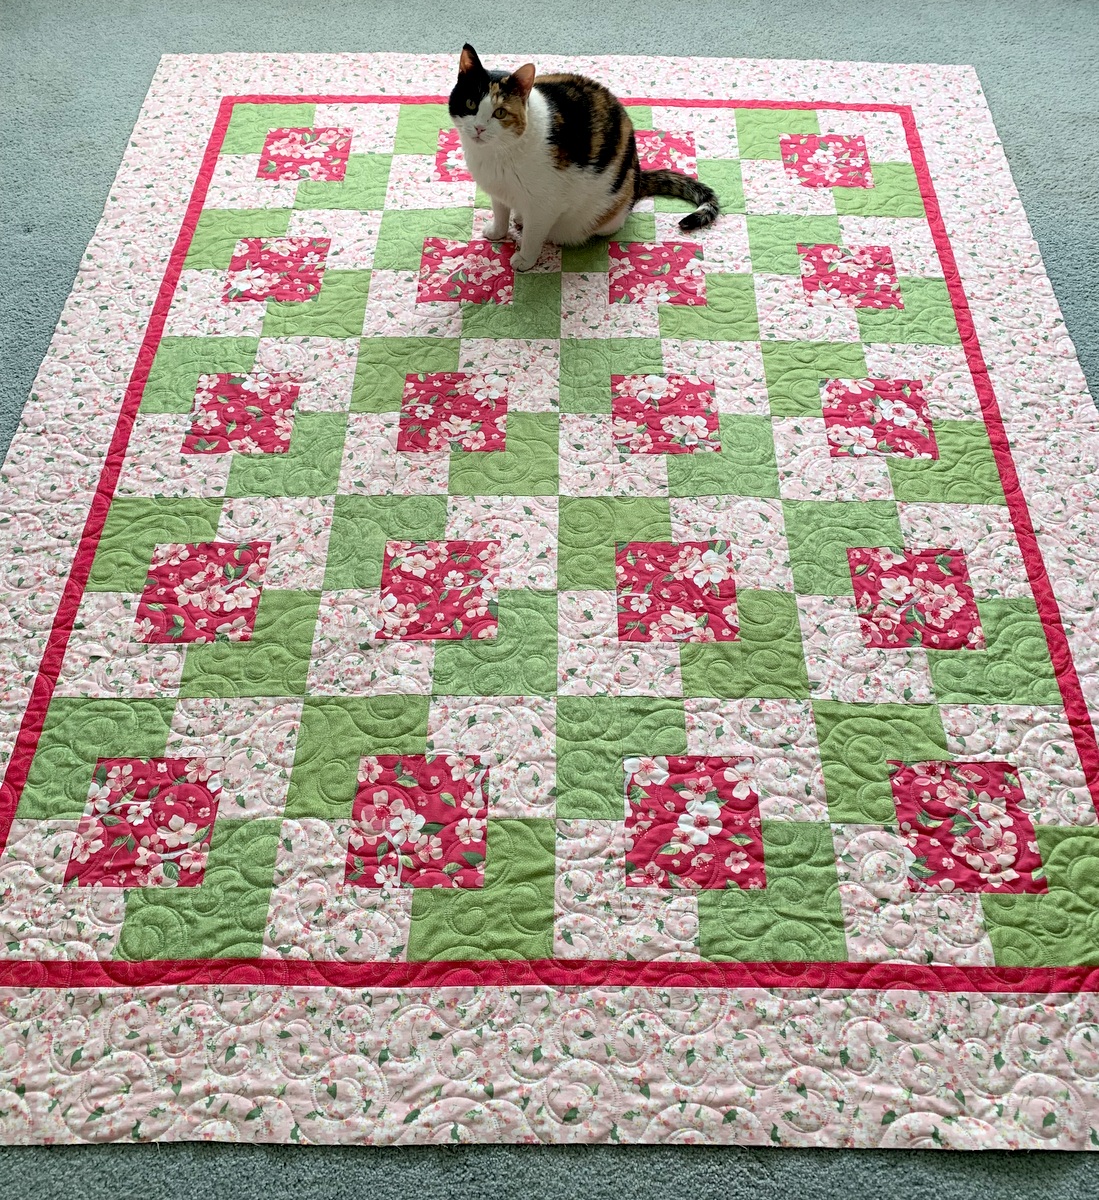
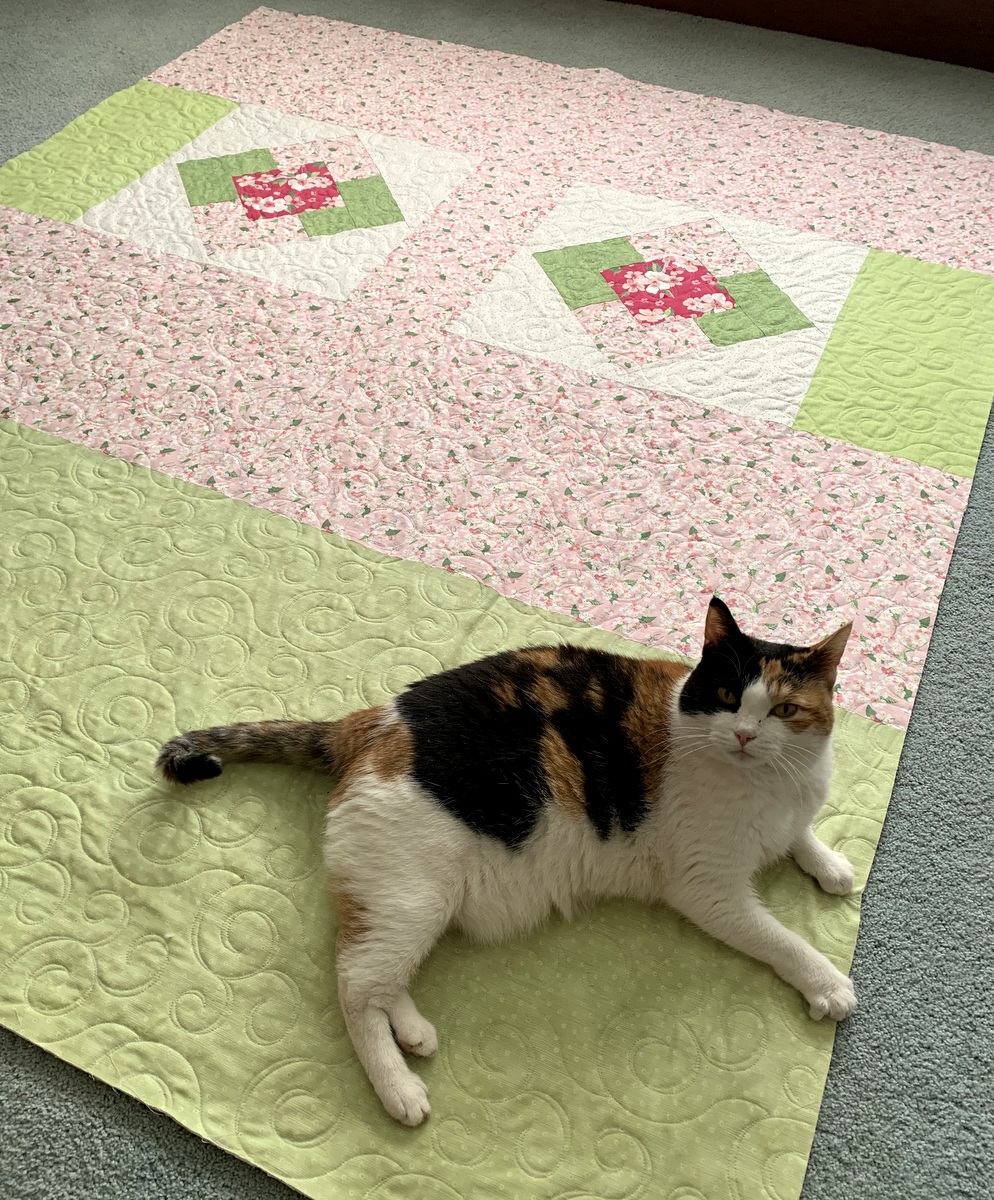
As soon as the quilt was trimmed, I spread it out to take some photos. Look who came along at just that very moment:

She was under the quilt just before this was taken:

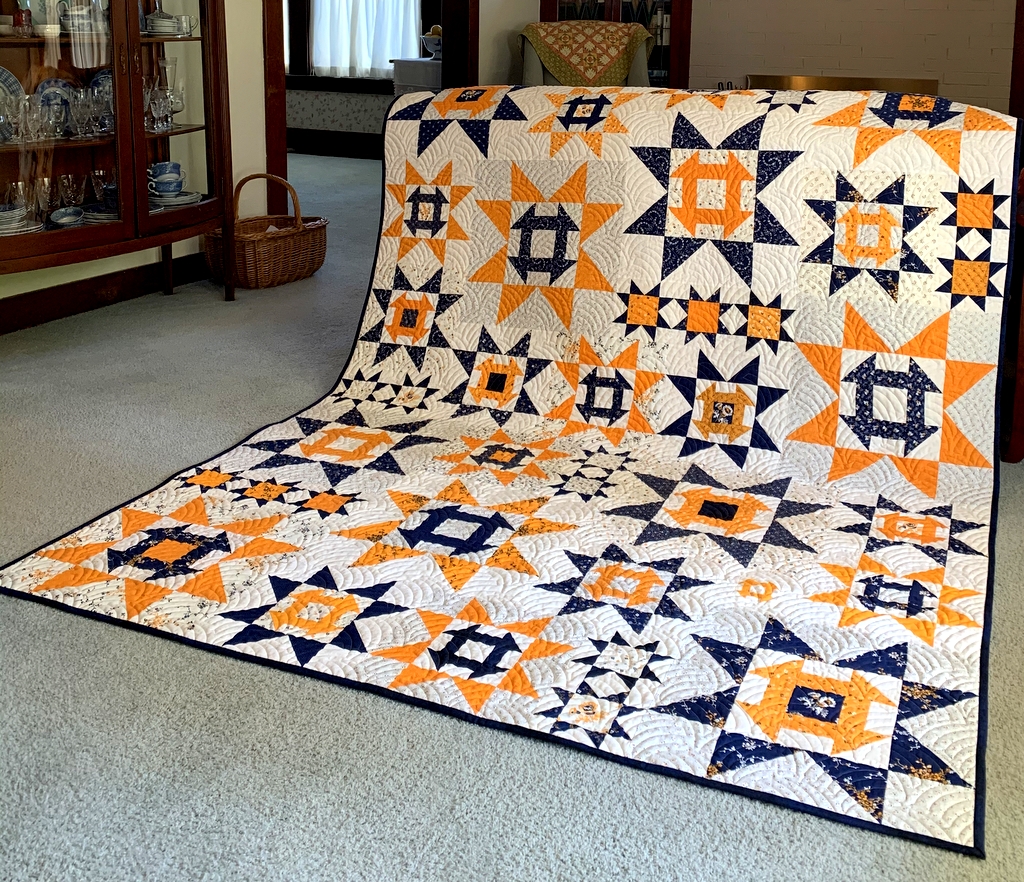
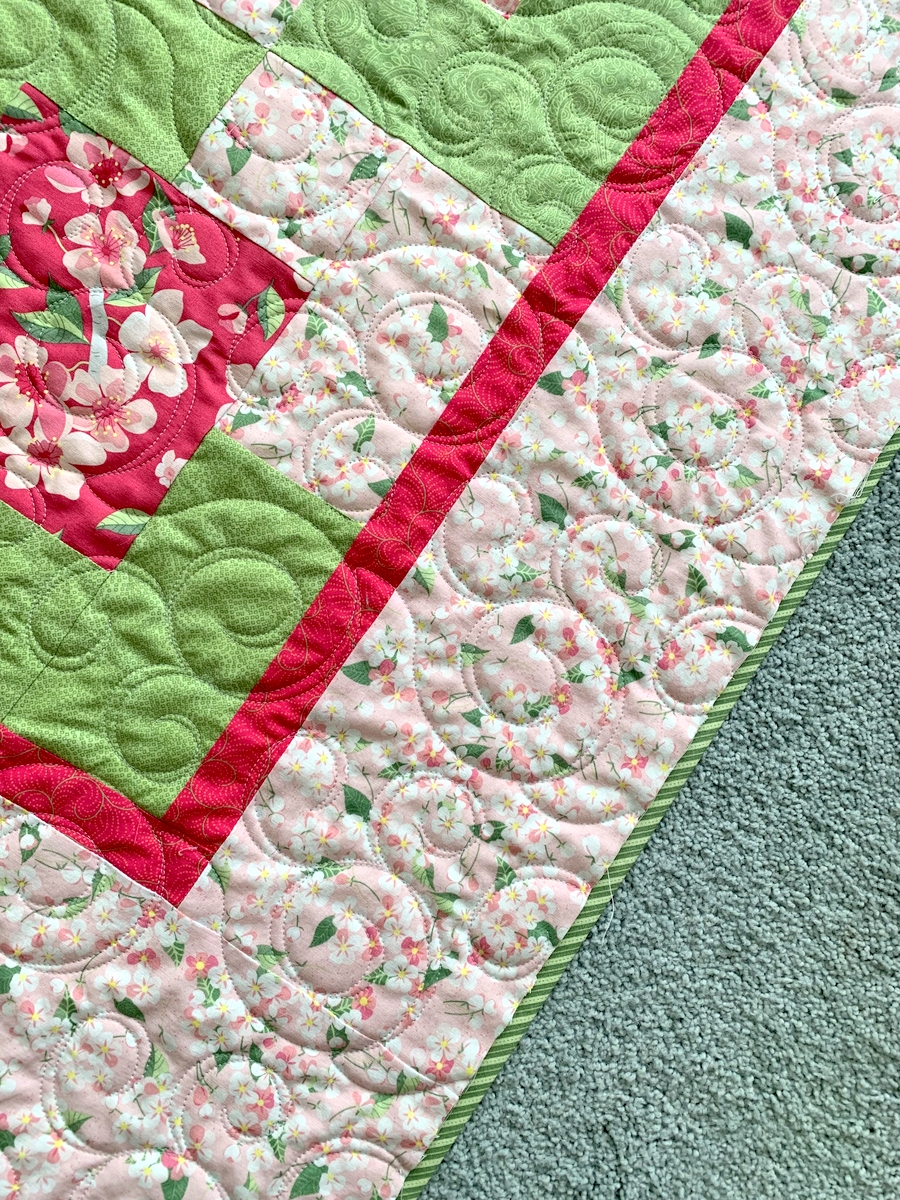
How about a  close-up? No, not of Coco! Look at the loops and swirls dancing across the surface of the quilt. Doesn’t it make you think of cherry blossoms caught in a breeze? The very essence of spring, right?

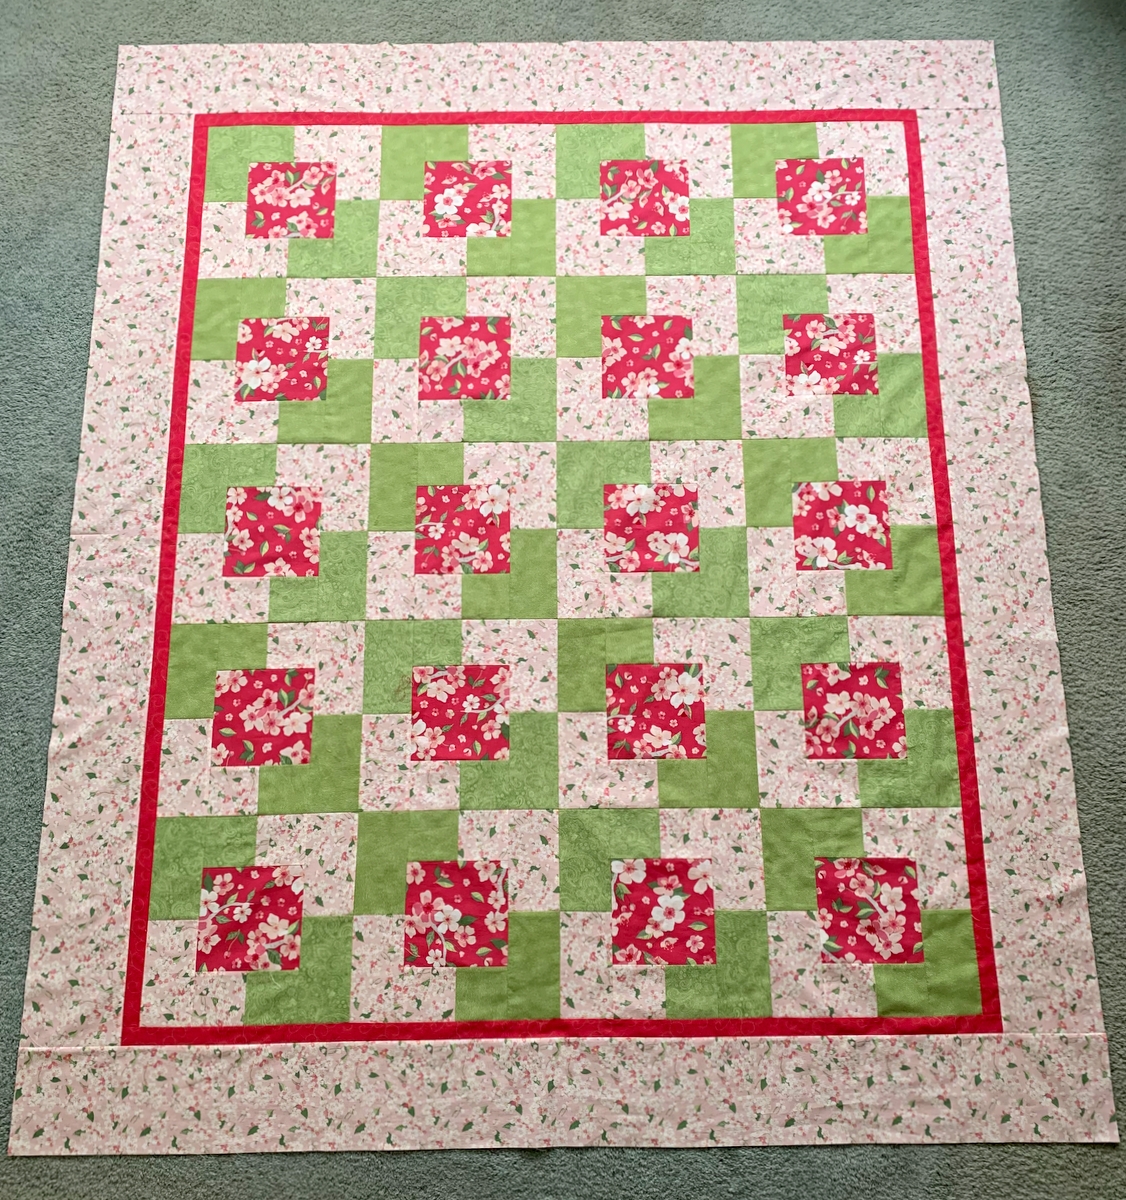
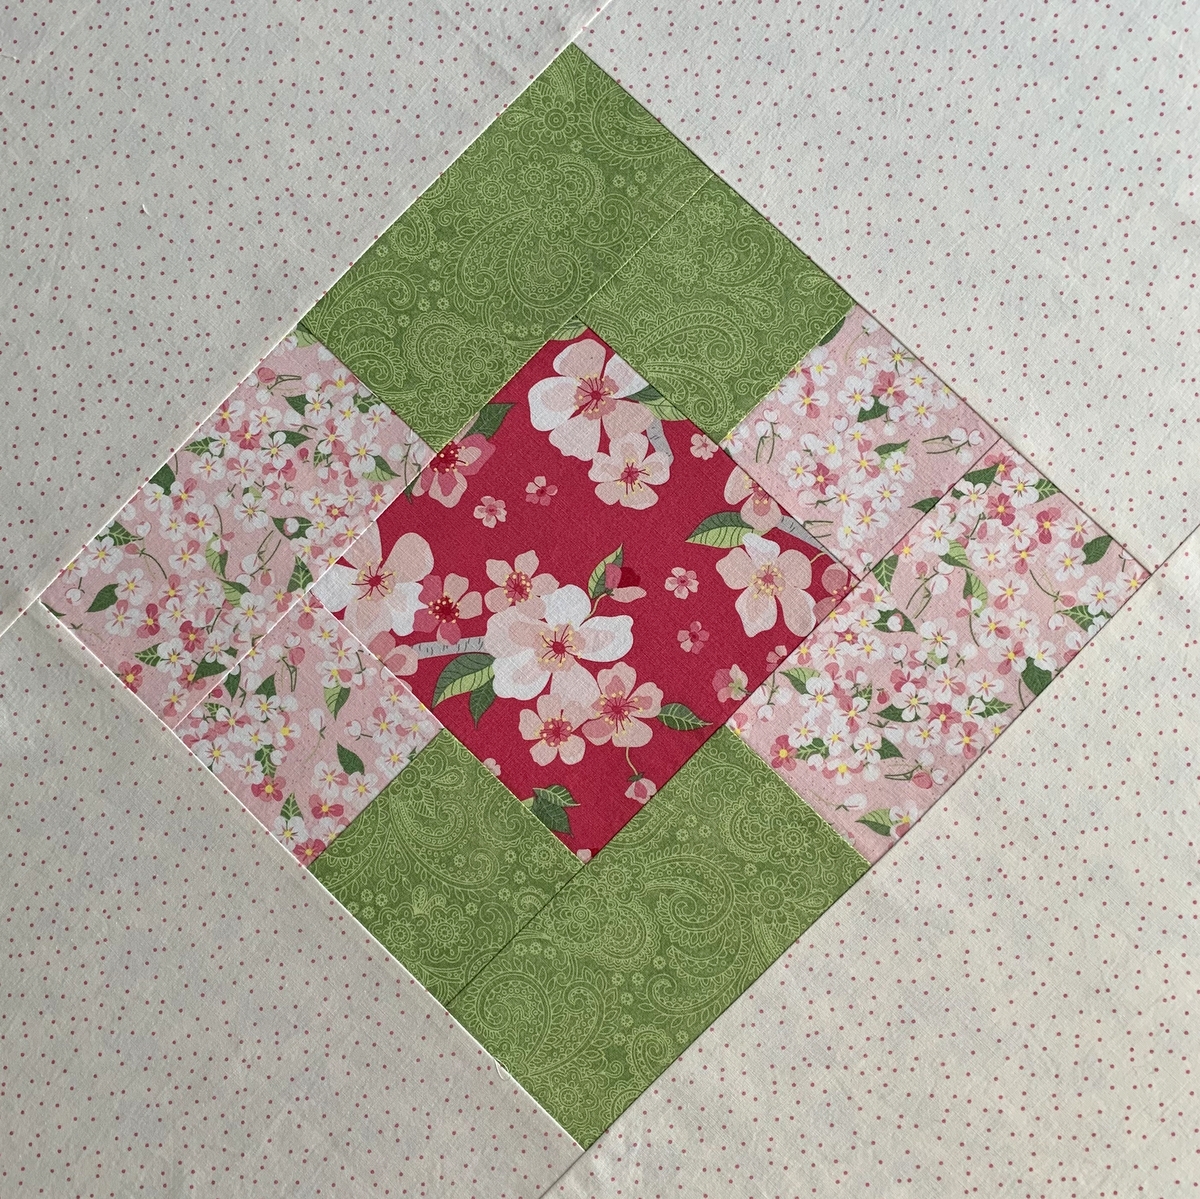
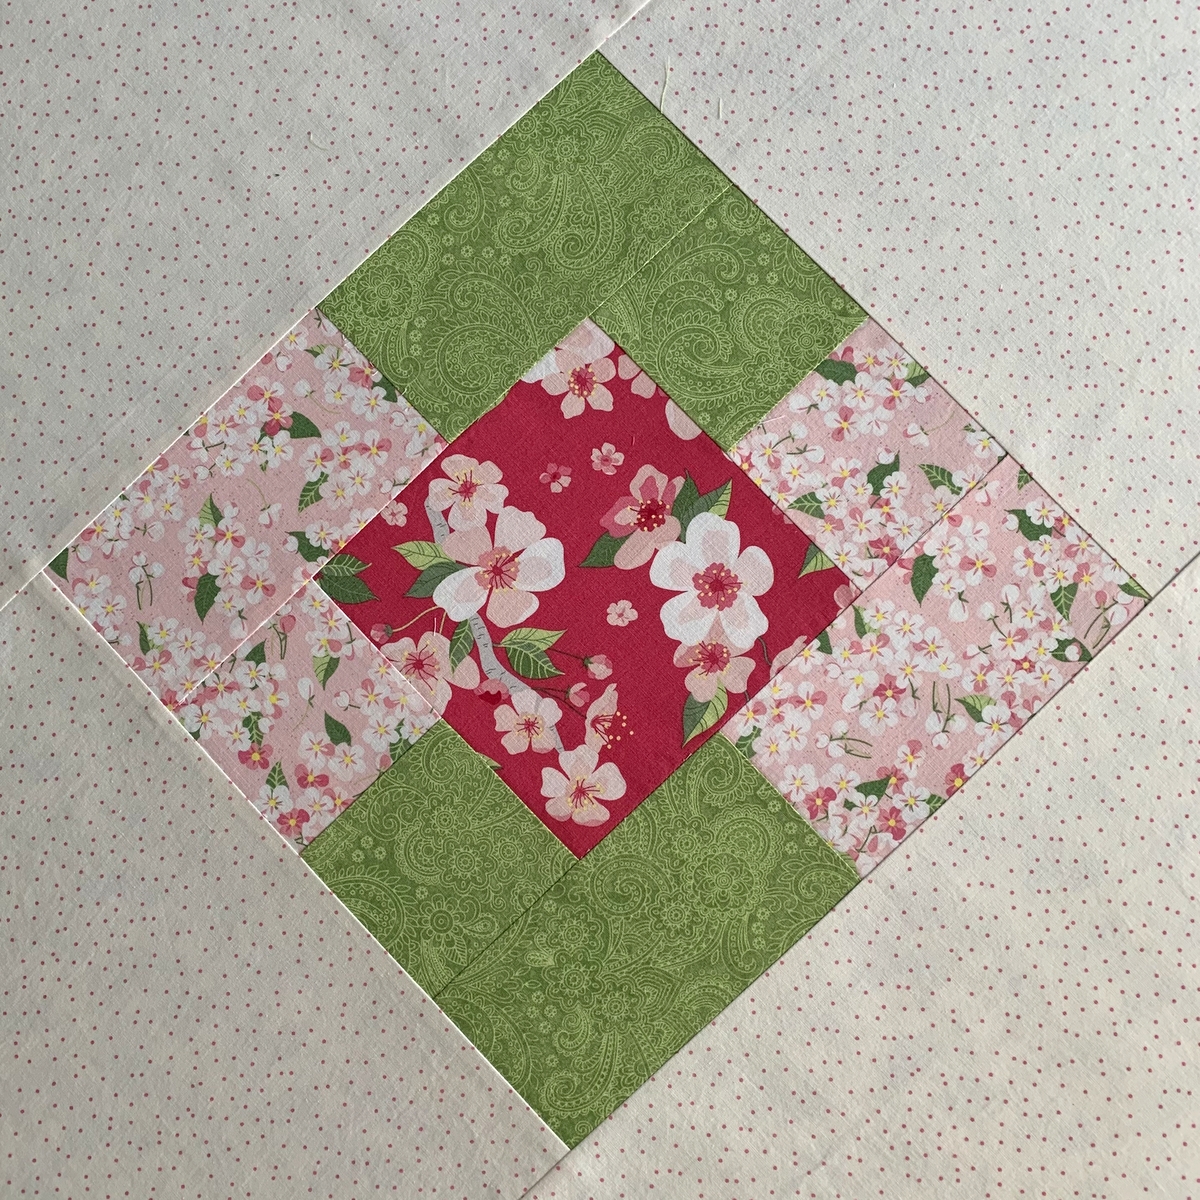
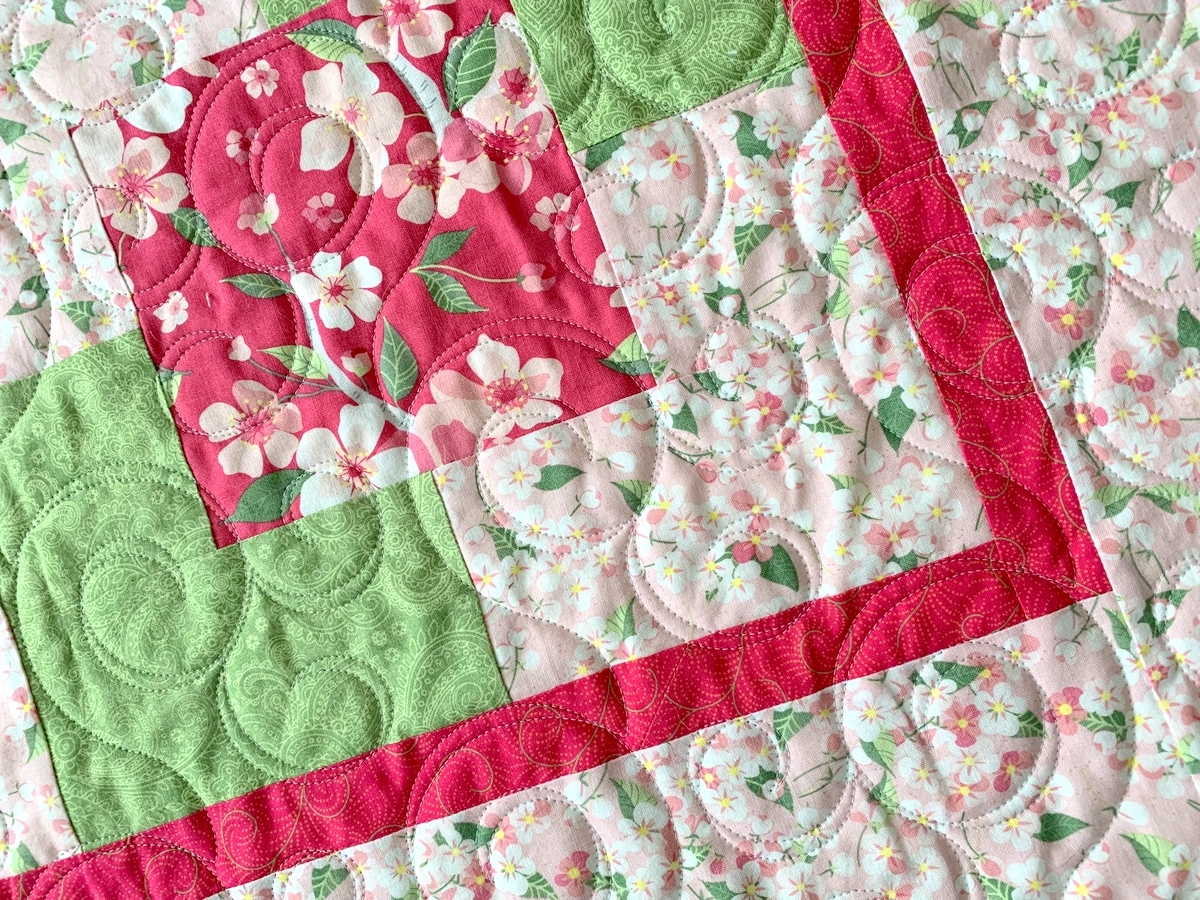
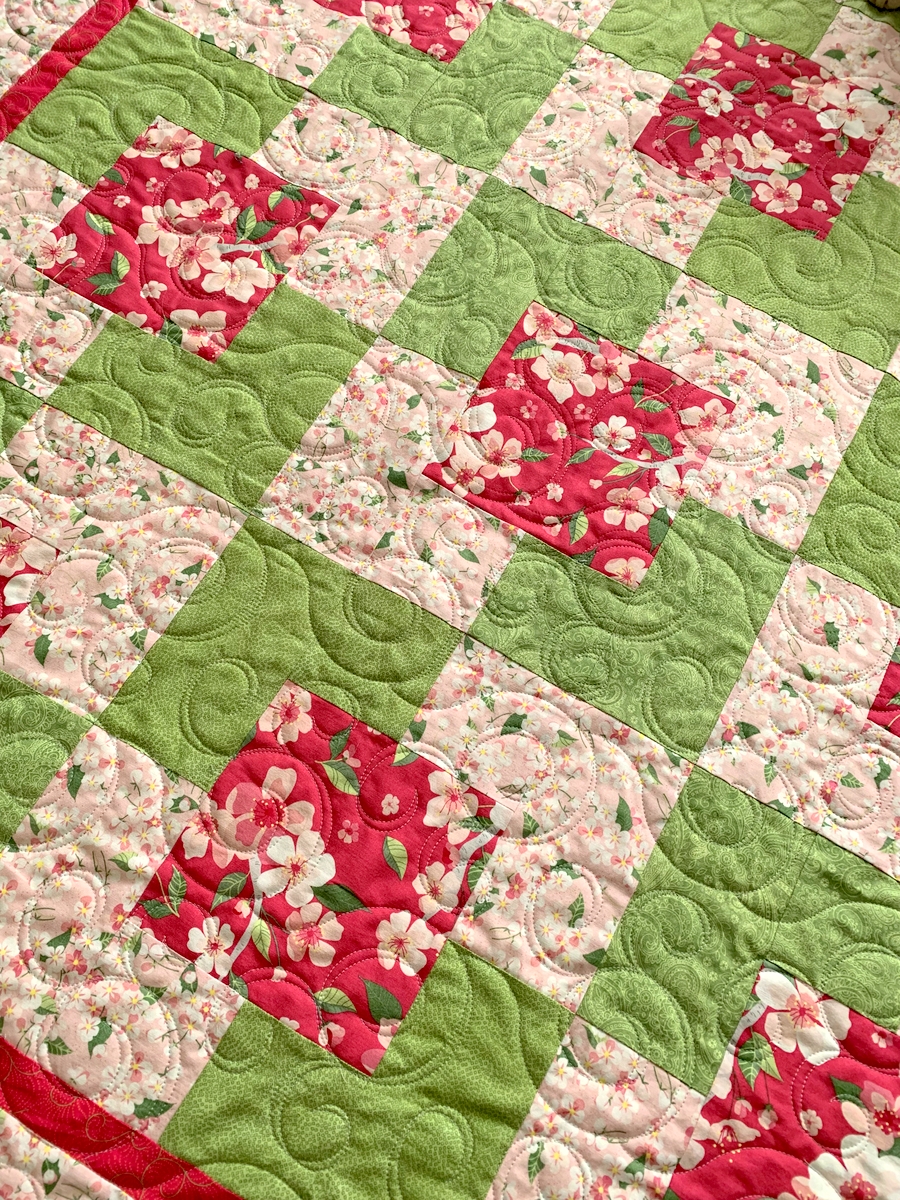
The quilt design is called “Embellish” by Quilts Complete. Notice how it echoes the swirls in two of the four fabrics: the green tone-on-tone paisley and the bright pink fabric used in the first border:

I asked Karlee to quilt this with a very pale grey thread. My reasoning? White thread would show up too much on the green fabrics. I always want the quilting to provide subtle texture so I tend to choose thread colors that blend rather than stand out. For me the fabric is always the star.

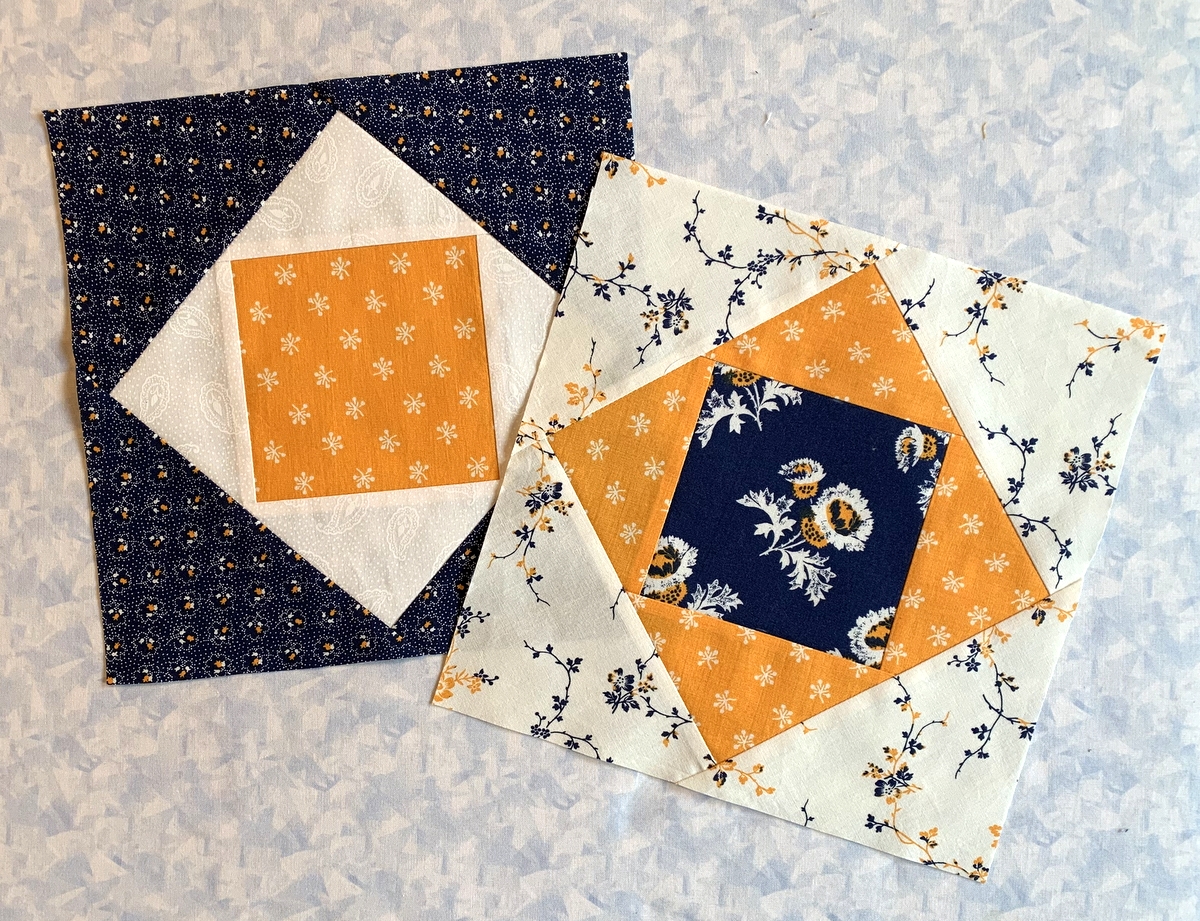
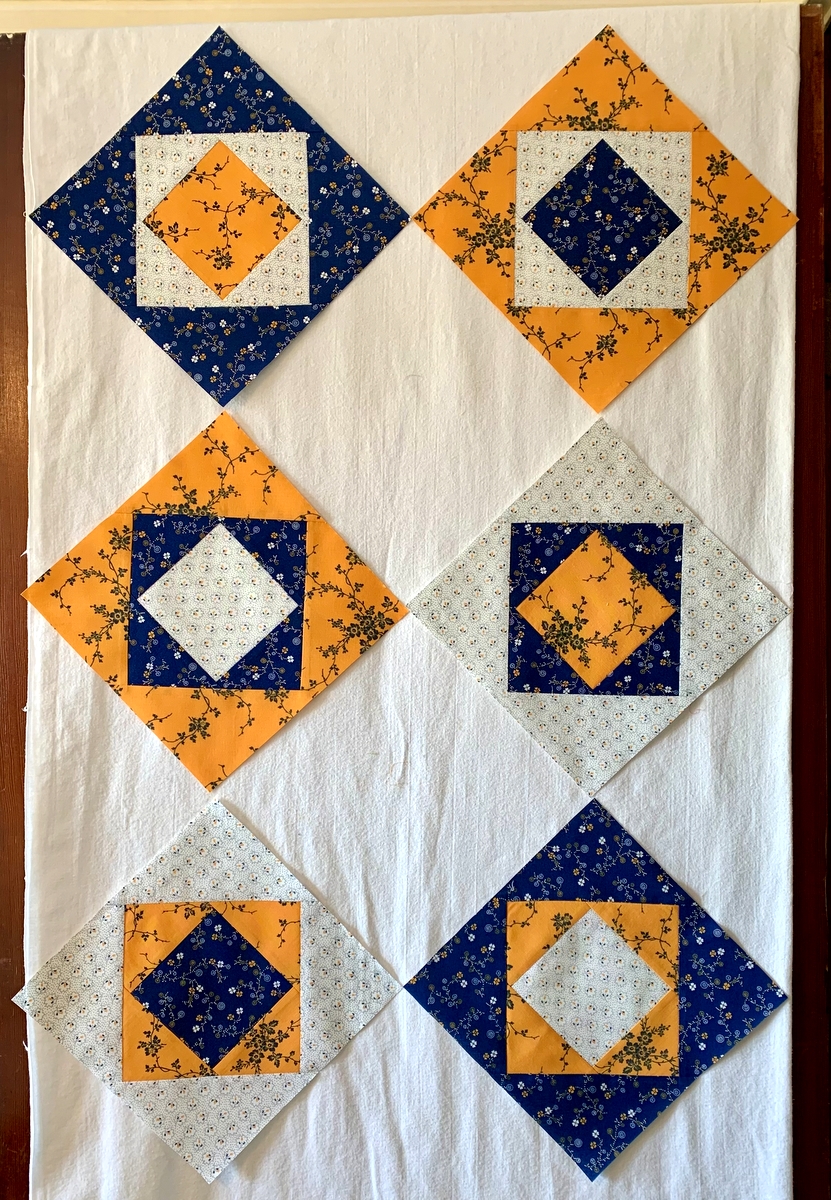
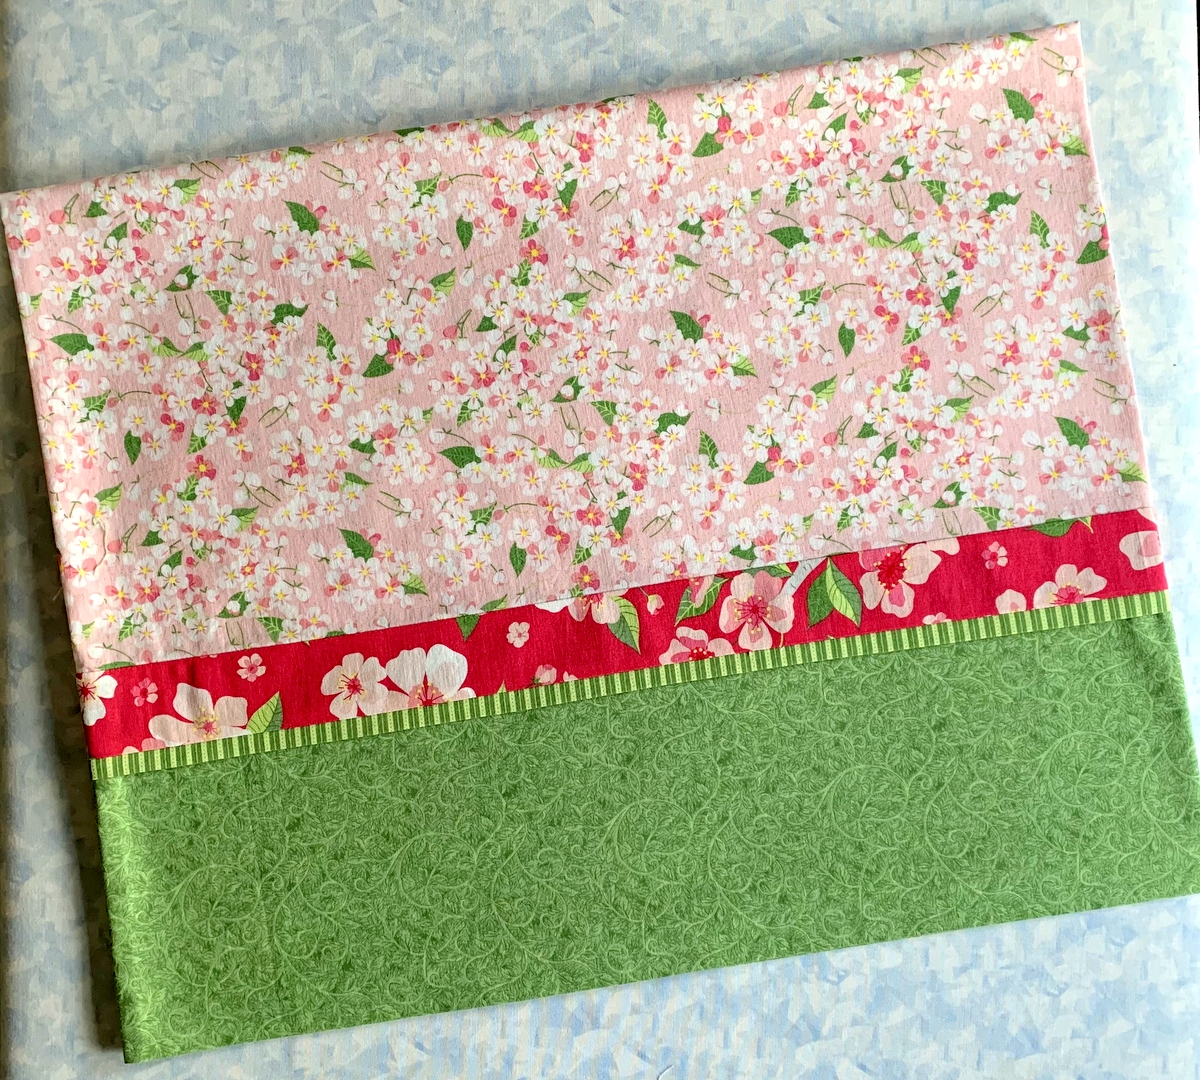
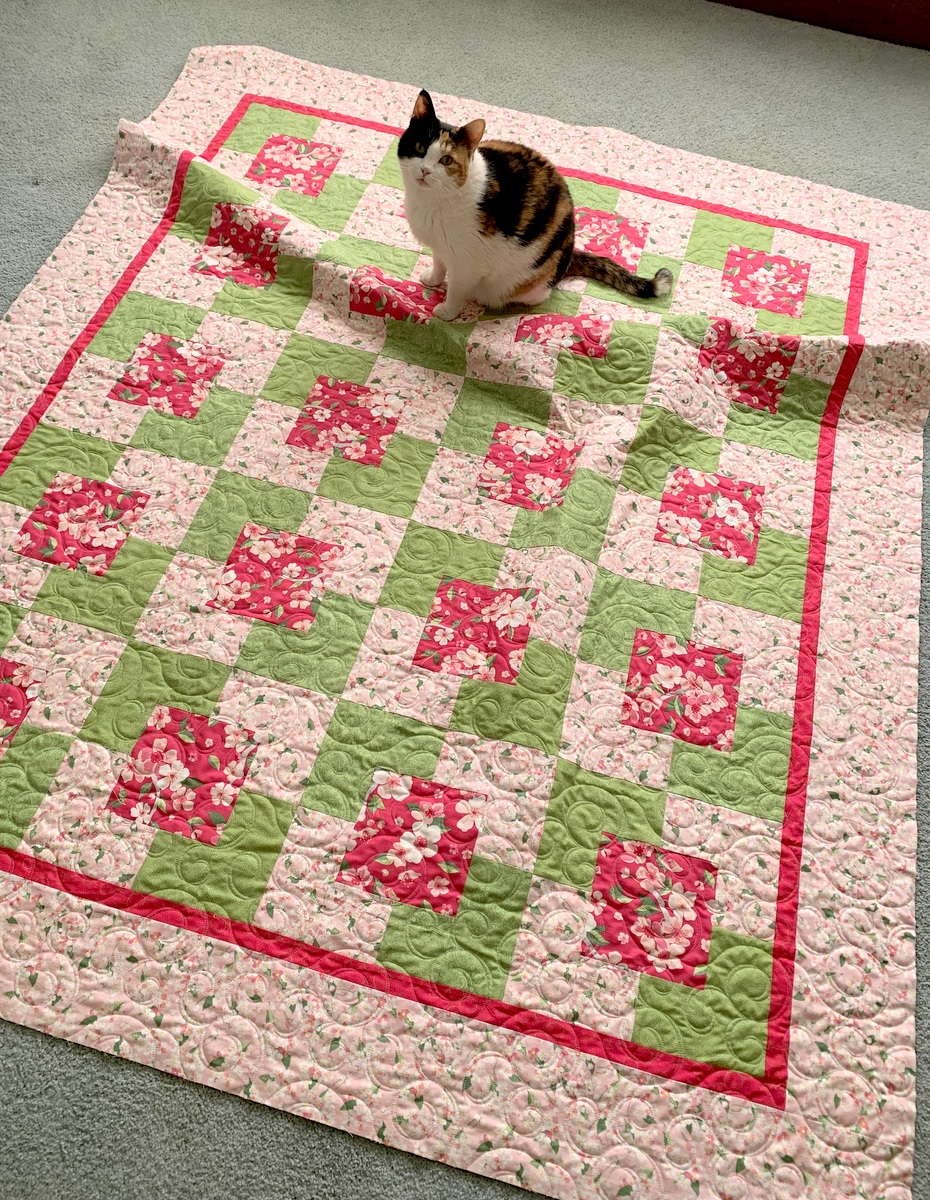
Here’s a look at the back of the quilt, featuring two leftover blocks on point and one complacent cat:

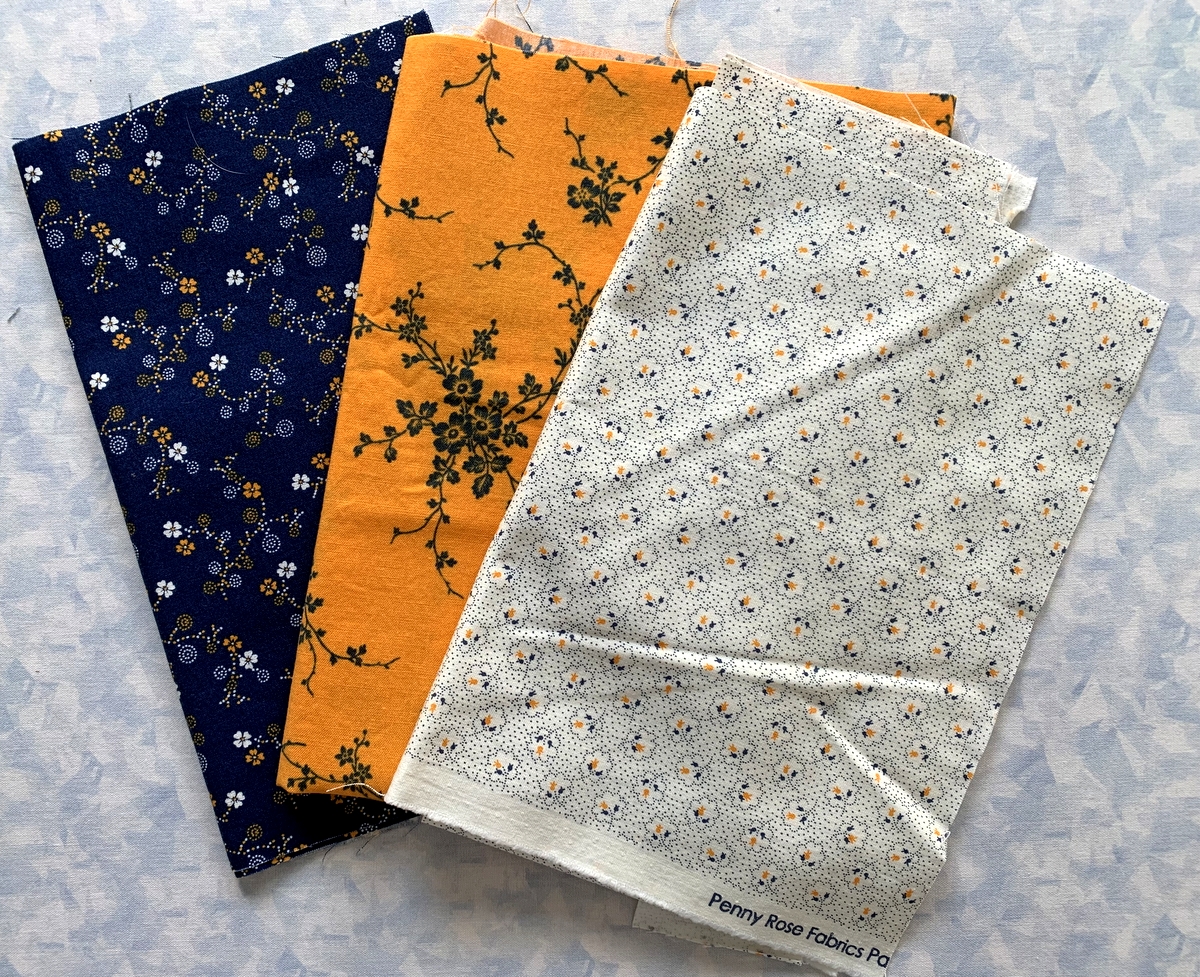
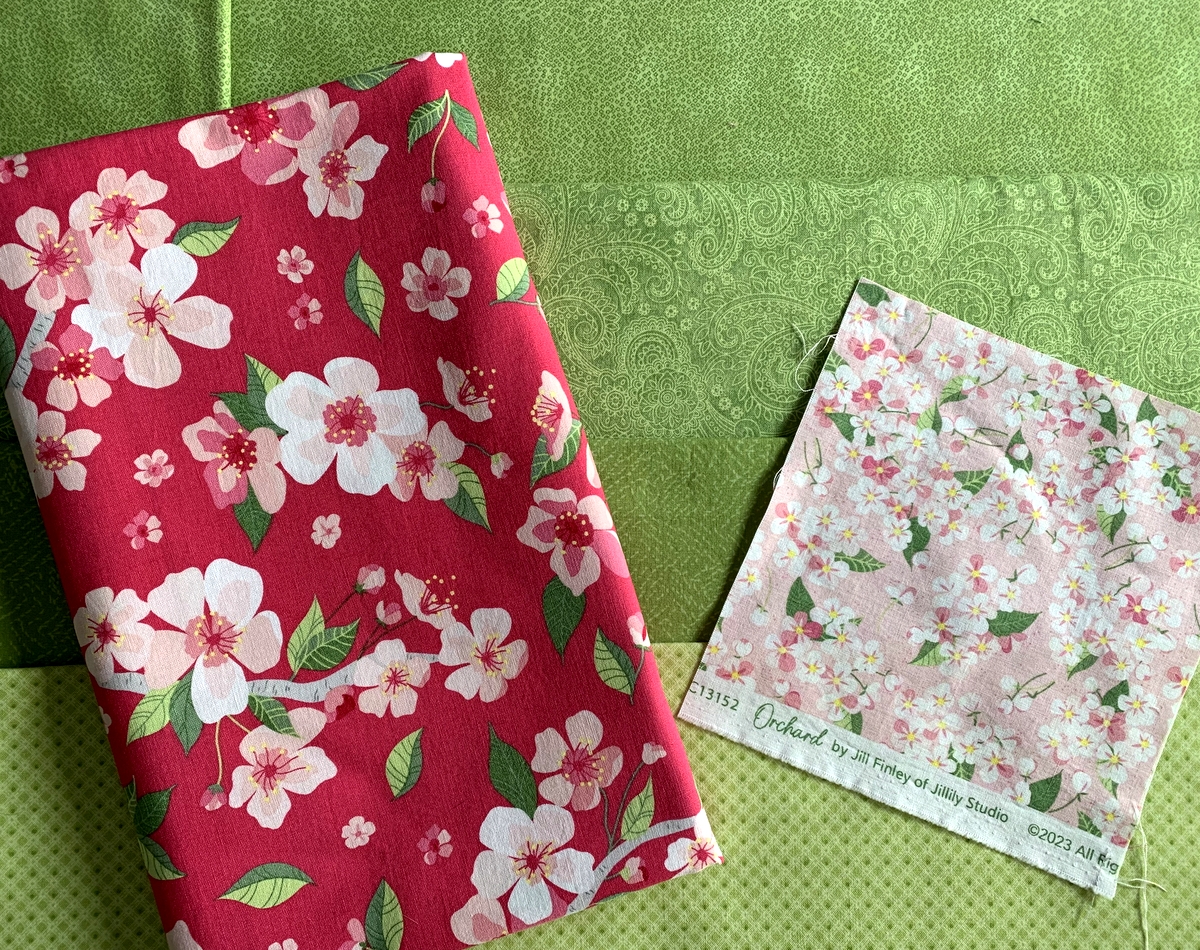
What about the binding? I auditioned these three fabrics:

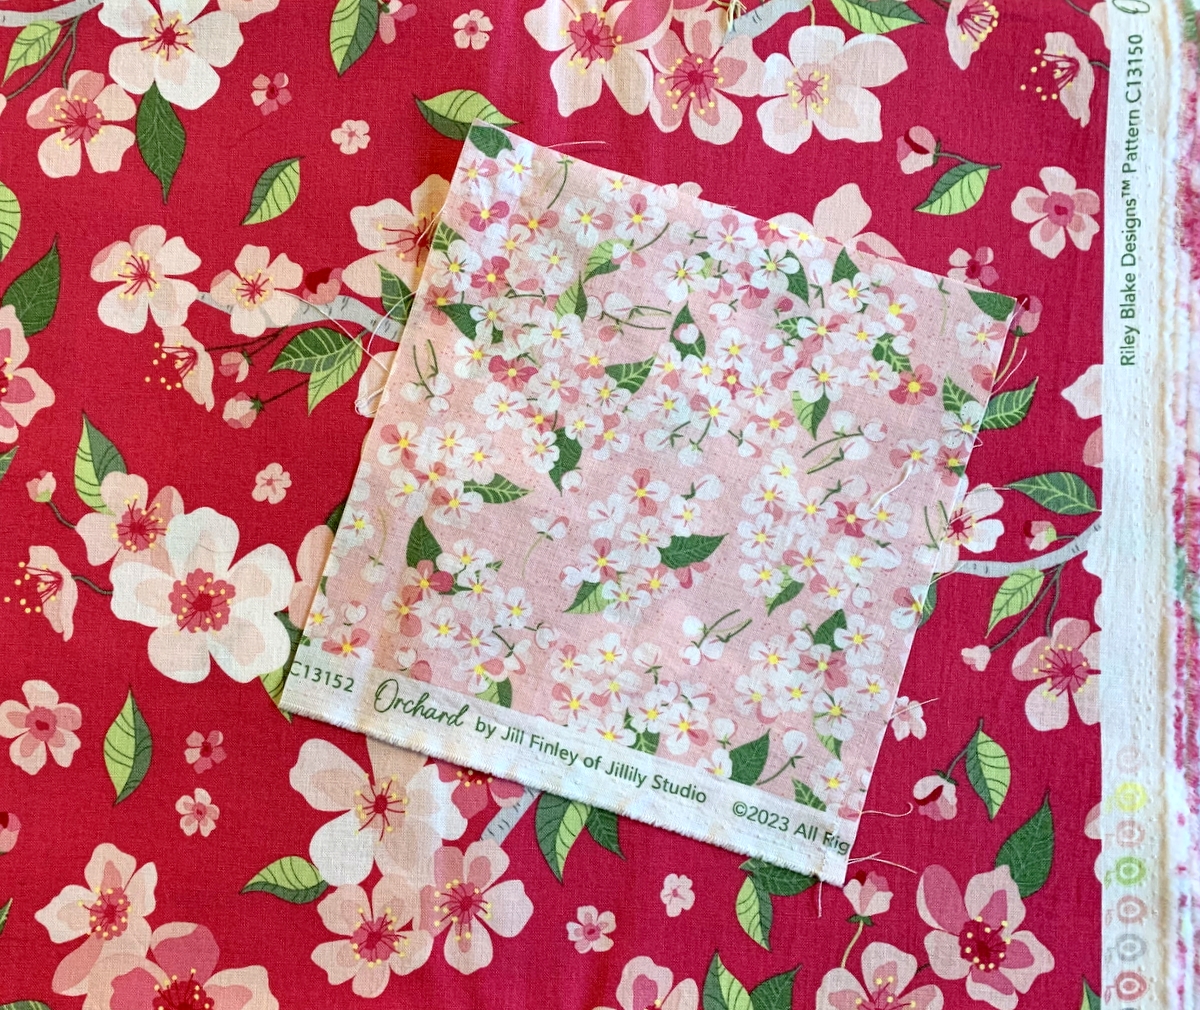
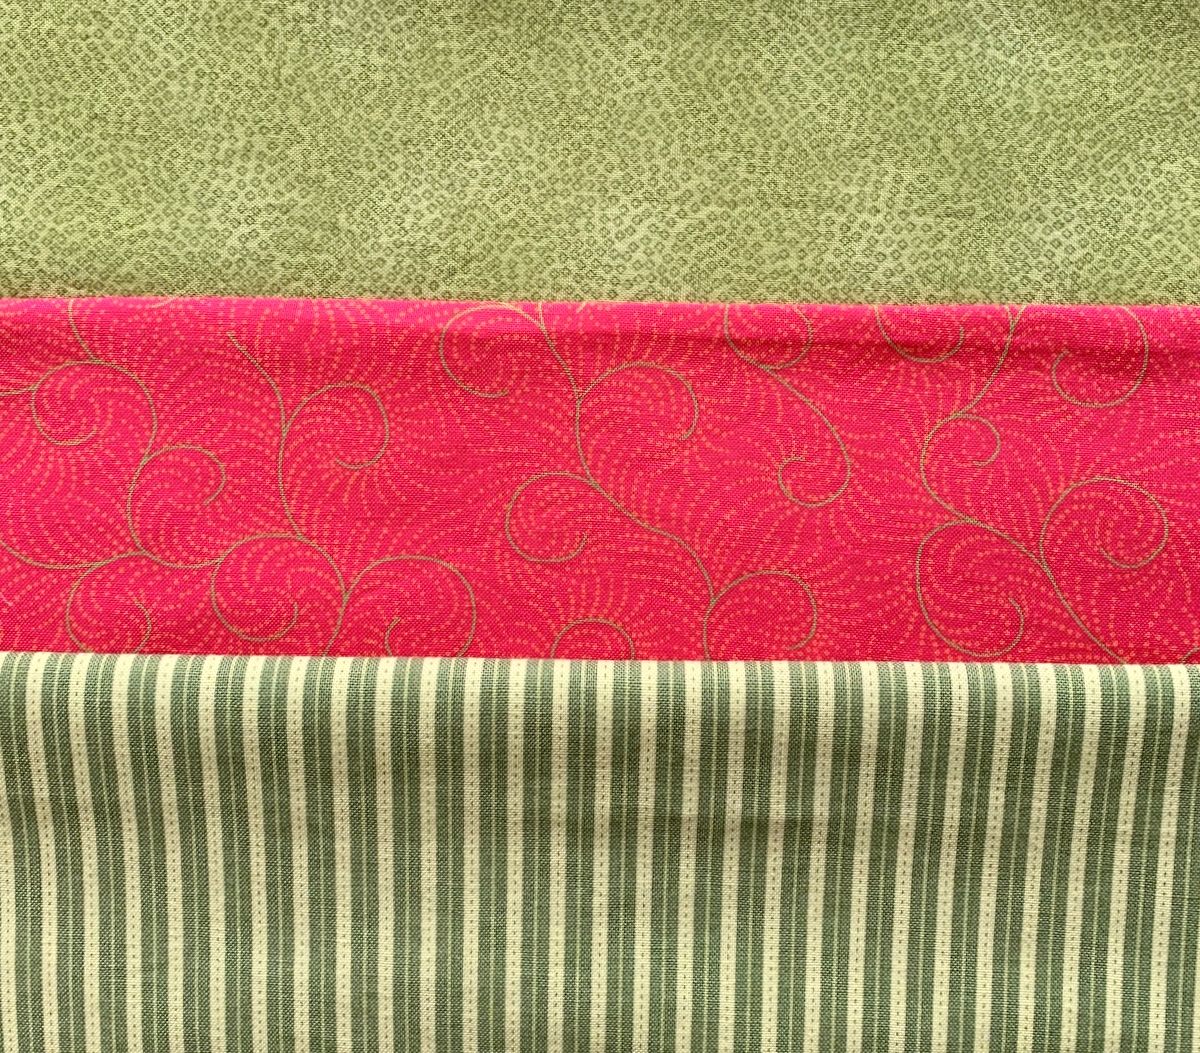
The top two are already in the quilt. The third is a stripe that’s from the same line as the cherry blossom focus fabrics, namely “Orchard” by Jill Finley of Jillily Studio. She designs for Riley Blake Designs. Now I happen to like a striped binding. In fact, the only thing I like better than a striped binding is a bias striped binding. So I cut a bias strip and placed it along one edge to get a better sense of how it would look:

The verdict? No contest!


Posted in cats, cherry blossom quilt, update | 6 Comments

Next Batch of Blocks

I’m popping in to show you blocks 15-20 in my current WIP (Work-in-Progress) based on the pattern Floating Squares and my stash of cheddar and indigo fabrics:

Here are all 20 blocks, arranged to spread the cheddar, indigo, and cream fabrics more or less evenly across the surface of the quilt:

I’ve decided to make 10 more blocks for a 5 x 6 layout. I’ll have to be very careful in selecting the remaining fabric combos. Four blocks will have cheddar in the outer triangles and the remaining six blocks will be divided between indigo and cream outer triangles. My goal is to get a mix of prints in such a way that neighboring blocks will not share fabrics. My problem is that I have a plethora of cheddar prints and several indigos but only two cream prints remaining from the 2015 “Cheddar and Indigo” line by Penny Rose Studio for  Riley Blake Designs.

While I haven’t decided on a final layout yet — blocks as laid out in the pattern? blocks on point? blocks separated with lattice? — I’m definitely leaning in one direction. Of course, I reserve the right to change my mind when I have 10 more blocks.

Block production has slowed as the weather has improved. The Dear Husband and I are in full weeding/planting mode at the moment. Is it okay to hope for rain?


Posted in cheddar and indigo, economy block, family, floating squares, square-in-a-square, update | 4 Comments

A Value-able Lesson

Here are my two latest Floating Squares blocks:

Aren’t they pretty? You’ll notice the one on the right has a fussycut center from the same print as an earlier block but in a different colorway. I wish I had more of the one dark and one light outer triangle fabric but I only had enough scraps to finish those two blocks.

When I first started making these Economy blocks using leftover indigo and cheddar fabrics from a previous quilt, I quickly realized that the cheddar fabrics were dominating the blocks. Remember my first six? Here they are again:

You’ll recall I thought of turning the blocks on point and alternating plain blocks of a creamy white background to lower the cheddar factor . . .

. . . but I wanted to make a few more blocks before coming to any firm conclusions about what direction to head.

Well, now there are 14 blocks:

Let me say first that I love these blocks individually. But collectively? They still feel a bit overpowering. And I’ve figured out why. Yes, the cheddar is dominant but there’s something else:  my palette of indigo, cheddar, and cream represents dark, medium, and light values. Nothing in between! No medium lights, no medium darks. There is nothing in the overall palette to soften the sharp contrast between dark, medium, and light.

Now that’s not necessarily a bad thing — but it is something I hadn’t considered when I chose the fabrics. If you take a look at the fabrics Taunya of Carried Away Quilting used on her pattern cover quilt . . .

. . . you’ll notice that the overall effect of the quilt is soft because of the variation of values used across the quilt. I see several medium lights and medium darks in addition to the usual dark, medium, and light values.

I will not be able to achieve that softness with my fabrics so I need to consider my options. I’ve already considered putting my blocks on point and alternating with plain blocks of creamy white. If you go back to the first photo, you’ll notice the block on the left includes a creamy tone-on-tone paisley print in the first set of triangles. I believe there’s enough of that fabric from my stash to make alternating blocks as well as setting triangles.

Another possibility is to separate the blocks with sashing strips of the same creamy white. Not a bad idea. Certainly worthy of consideration.

Yet a third is to add one more row of triangles to my floating squares, using indigo or cream where the cheddar triangles would normally go. That would relegate the cheddar to the center squares and first set of triangles. Also not a bad idea because it would tone down the cheddar factor considerably. But it would also create a larger block, one that finishes at around 13″ rather than 9″. Of course putting the 9″ squares on point would do the very same thing.

I’m going to make a few more blocks (because it’s so much fun!) and continue to ponder my options. Lest you think I’m disappointed at the possibility of changing course with the quilt design, let me assure you I am not. Even experienced quilters can be caught off guard. This has been a valuable lesson for me in considering fabric values — and sometimes these kinds of lessons result in quilts that surpass original expectations.

Regardless of the outcome, I am going to love this quilt.


Posted in cheddar and indigo, economy block, floating squares, square-in-a-square, update | 5 Comments

Jacks, Anyone?

Making their appearance are three more cheddar and indigo blocks made from the *free* Floating Squares pattern by CarriedAwayQuilting:

As I showed you in my last post, two sets of squares of three different fabrics yield six blocks, none of them the same. I only had enough of the light background fabric to make one set of squares so my yield is only three. No matter; I have plenty of other fabrics to keep me going.

The design in that light fabric reminds me so much of the game of jacks. If you have no idea what I’m talking about, you’re probably not a Baby Boomer like me (born between 1946 and 1964). The game of jacks was a favorite of mine as a kid; my twin Diane and I would play for hours.

As I was happily sewing these blocks today, I wondered if anyone born in subsequent generations would even knows about jacks. Out of curiosity, I googled “game of jacks” just now and — wonder of wonders — you can actually buy new sets. This is what jacks look like:

The object of the game is to bounce the ball and pick up a jack before the ball bounces again. I’m tempted to buy a set to have on hand when Diane comes to visit next.

But I digress. I have one more block to show you:

This one was made with a fussycut center. The blossoms are oriented so that they’ll still look good if I wind up putting the blocks on point:

I’m having so much fun playing with these cheddar and indigo fabrics! Several sets of squares have already been cut and are just waiting to be transformed into quilt blocks. Although Floating Squares is a simple pattern, there’s a bit of a challenge in finding just the right balance of small, medium, and large-scale prints in each block.

More anon!


Posted in cheddar and indigo, economy block, family, floating squares, square-in-a-square, update | 7 Comments

Floating Squares

Earlier this month Taunja of CarriedAwayQuilting released a free pattern called Floating Squares:

As you can see, I downloaded it.

It’s a fresh and clever take on the traditional Economy block, also known as Square-in-a-Square. Each block is made up of a center square surrounded by triangles. By making the triangles that surround the center square a bit larger, the square “floats” in the block because its points don’t touch the next seam.

As Taunja notes in her pattern, this means you don’t have to match points when the squares are sewn together, and you also avoid the possibility of cutting off points. I don’t have a problem with either of those things because I pin and sew carefully. Still, I was drawn to the design because of its ease of construction and slightly airy look.

Her pattern calls for 21 fat quarters. I don’t have many fat quarters in my stash (because I seem incapable of buying pieces of fabric less than a yard in length). As I was pondering what fabrics I might use for some test blocks, my eye fell on one of my very favorite quilts, Scattered Stars, made in 2020 from a collection of fabrics from the “Cheddar and Indigo” line by Penny Rose Studio for Riley Blake Fabrics:

After finishing Scattered Stars, it was plain to see that there was enough fabric left over to make one or even two more quilts.

Although not fully committed to making another cheddar and indigo quilt, I decided to make a few blocks anyway. Three fat quarters yields six 9½” blocks. I started with these three fabrics . . .

. . . and here are the results:

Oh my! That’s a lot of cheddar. Too much cheddar?

Let’s see what putting them on point looks like:

Imagine that with a creamy white fabric in the alternating blocks. Oh yeah!

Before making any final decisions about settings, I’m going to make another set of six blocks using three different fabrics. The blocks go together easily, and Taunya’s pattern is beautifully written and illlustrated.

There is one change I will make in constructing the next six blocks, though. To maximize the use of fat quarters, Taunja’s instructions call for four triangles to be cut from one square, meaning twice on the diagonal. This results in the outer edges of each triangle being on the bias. (Because of this, I starched each block after the second round of triangles was added before squaring it up to 9½”.) Since I’m cutting my fabrics from yardage, I’ll use squares that have been cut only once on the diagonal, which will make the outer edges of each triangle on the straight of grain.

To see more photos of the beautiful quilt on Taunja’s pattern cover, read her blog post here. The post includes a link to download the free pattern.


Posted in cheddar and indigo, economy block, floating squares, square-in-a-square, update | 8 Comments

Off to the Quilter!

The borders are on my cherry blossom quilt . . .

. . . and it’s ready to be delivered to my longarm quilter.

Don’t you love the freshness of the cherry blossom fabrics against the two spring green tone-on-tone prints? I sure do. The simplicity of the pattern (Town Square by Fabric Cafe) really lets the fabrics take center stage, which is always my goal.

I made a simple pieced backing incorporating two quilt blocks that were too similar to ones on the front. Celebrating Spring is the leading contender for my new quilt’s name but I’m open to other suggestions. Just sayin’.

There was enough of the small focus fabric print left to make a pillowcase for a loved one to go with her new bed linens:

It was made with my own tutorial, which you can see here.

I like this pillowcase so much that I’m sorely tempted to order more fabric to make a pair for the Portland White House. But seriously, the Dear Husband and I have enough other cases to sleep on. If I made pillowcases for every line of fabrics I fall in love with, we’d be sleeping on different cases every night.

Anyway, I’ve embarked on yet another new project that I’m eagerly looking forward to showing you. I hope you’ll stop by to see what it is!


Posted in cherry blossom quilt, family, home dec, pillowcases, roll-it-up pillowcases, tutorial, update | 3 Comments

Celebrating Spring

Happy First Day of Spring!

The vernal equinox in the Northern Hemisphere occurs tonight at 11:06 pm EDT. (Thanks to this being a Leap Year, the equinox is earlier than usual. Since spring is my favorite season, having it come early makes me very happy.)  And what a glorious day it has been: sunny in Portland OR with a few scattered clouds and a high of 70 degrees Fahrenheit. I celebrated indoors and out.

Outdoors? The Dear Husband and I spent a few hours weeding in the back yard garden. Telling the truth now: I really wasn’t celebrating. I am, after all, a Reluctant Gardener. But the beds we cleared look so good now that I can’t help but be glad about that. And the DH planted potatoes!

Indoors, I added the narrow border to my current Work-in-Progress. Check it out:

Right now my quilt top measures 51″ x 63″. The additional light pink floral I need for the outer border should arrive in the next day or so.

In the meantime, I started working on my pieced backing. I put those two duplicate blocks I wrote about yesterday on point and added setting triangles, using a pink polkadot fabric I found in my stash:

I made the setting triangles oversize in case I want to float the blocks (which I probably will).

By the way, I’m not the only one enjoying cherry blossoms. Mine are on my fabric but featured on the front page of today’s daily Oregonian newspaper is a photo of the beautiful blooms “popping with color” along Portland’s waterfront park.

Hmm. I named this post “Celebrating Spring.” Maybe that should be the name of this quilt. . . What do you think?


Posted in cherry blossom quilt, update | 5 Comments

Coming Right Along

The interior of my current WIP is complete. Take a look:

How pretty is that? I am loving the springtime vibe of these cherry blossom prints.

As I was laying out the blocks, I noticed a few of the center squares were cut from the same part of the pattern repeat. It was easy enough to simply rotate a block or move it to another part of the quilt. Before I started sewing, I looked again across each row, up and down each column, and even on the diagonal. I was sure I had a good distribution all around.

However . . . after sewing the blocks into rows and then sewing the rows together, I could see duplicates in one vertical and one horizontal row. The blocks weren’t touching each other and perhaps no one would ever notice but . . . I did. So of course I made two more blocks to replace the duplicates. I’ll probably put the dupes on the back of the quilt.

I ordered more of the light pink floral for the outer borders because I want a wider strip than the pattern calls for. The instructions also call for a narrow first border of the larger floral print but I want something that reads more lilke a solid. I just happened to find a good candidate in my stash, one that I’ve had for oh, at least 20 years. I auditioned it with the other fabrics . . .

. . . and I think it works perfectly. I hope you do, too!


Posted in cherry blossom quilt, update | 8 Comments

Not So Fast

The plan was to make a fast quilt top last weekend. My starting point was this luscious pair of fabrics from the “Orchard” line by Jill Finley for Riley Blake Designs:

(I ran off in high spirits last year and bought several pieces from the line, not knowing what I would do with the fabrics, just knowing that I had to have them.)

I picked this pattern . . .

. . . because it called for just three fabrics and I could tell it would be fast and fun to make, just the ticket because I’ve been in a bit of a sewing slump.

The pattern calls for one yard each of three fabrics and is made of 12 blocks that finish at 15″. Two slender borders complete the quilt. I immediately decided to make a larger quilt. I downsized the block to 12″ and chose a 4 x 5 layout, which would yield a top measuring 48″ x 60″ before borders. The outer border will definitely be wider than the one in the pattern; my plan is to create a top that measures 60″ x 72″ or thereabouts, a good size for a throw or lap quilt.

I also decided to make the quilt a wee bit scrappy by choosing four green fabrics that are very similar in color and value. Here they are with the focus fabrics:

I was so sure of my fabric choices that I didn’t make a test block before cutting my strip sets from the four greens and the smaller floral print. Uh-oh. Big mistake. I was definitely not loving the first four scrappy blocks:

My favorite green was the tone-on-tone paisley so the plan was to proceed with that one. I was preparing to take the stacks with the remaining greens apart so I could salvage the pink floral . . .

. . . when I thought, “What about using a second green?” I retrieved one of the sets above and made four test blocks with it and the paisley:

I’m liking this much better. I could have gone with one green and I almost did, realizing that part of the charm of this design is its utter simplicity. But I really like the way the two greens play with the florals as well as with each other, and the second green does add a bit more visual interest.

The blocks went together very quickly once I had the pink floral pieces attached to the greens. This is what I have to show for it:

Isn’t that refreshing? I love pink and green together. The colors are so reminiscent of daphne, that harbinger of spring . . .

. . . and the peonies in our yard that bring me joy every year . . .

. . . and even this photo of chestnuts in blossom that I took in April 2015 when the Dear Husband and I were lucky enough to spend three weeks in Paris:


Since today just happens to be National Quilting Day, it’s fitting that I was able to spend a good part of it in my sewing room. Even though this project got off to a very slow start, I am eagerly looking forward to sewing my blocks together and adding borders.

Something else to look forward to:  spring begins this coming Tuesday!


Posted in cherry blossom quilt, family, Paris, update | 8 Comments

A Quilt for Coco

Like most cats, my Princess Cordelia — known to most as Coco — is an expert napper. She has plenty of roosting spots around the house, including on our bed, on the couch, on the chair and ironing board in my sewing room, and wrapped around the Dear Husband’s head (I’m not kidding). Until very recently, the one place that was off limits to Coco was the guest room.

All that changed when my twin Diane came to visit in November and came down with Covid. I felt so sorry for Diane that I allowed Coco to keep her company. Coco quickly added the guest bed to her list of favorite spots to catnap. Although I love seeing cats on quilts (check out #catsonquilts on Instagram), I didn’t want Coco on the quilt in my guest room. She won’t let me trim her nails, and the last thing I want to see is claw marks marring the lovely canvases of my quilts.

I quickly put an old bath towel on the guest room bed, and Coco has been quite content to snooze on it:

Still, I thought it would be nice if she had her own quilt, so I whipped this up yesterday:

Of course it’s not a real quilt. It’s a flannel blanket made after consulting a few of the Self-Binding Baby Blanket tutorials abounding on the Internet. After completing the blanket, I stitched four straight lines in a starburst pattern in the interior to hold the two layers together because I wasn’t sure if the blanket would keep its shape after being laundered.

Here’s a shot of the blanket taken yesterday evening, in anticipation of a visit from Coco:

There was evidence this morning (an imprint of her plump body) that she had napped on the blanket sometime in the night.

Today Coco’s Quilt (which is how I keep thinking of it) went into the washer and dryer. I am happy to report that the little quilt kept its shape beautifully. As expected, it did shrink because I didn’t prewash the flannel fabrics beforehand. It finished at 30.5″ square before laundering and 29″ square after.

As I made the blanket, I made notes to myself on suggestions and instructions I would add if I were to make another one. I’ll write those up and offer them in a subsequent blog post. In the meantime, I’m waiting for Coco to curl up on her new quilt. It’s just a matter of time.


Posted in baby blanket, cats, family, self-binding baby blanket, update | 5 Comments